
ESP32 BLE Proxy
Use a cheap ESP32 board as a remote Bluetooth radio, communicating over MQTT. This lets you run BLE Scale Sync on machines without local Bluetooth: headless servers, Docker containers, or devices where the built-in radio has poor range.
Already running ESPHome?
If you already have an ESPHome Bluetooth proxy mesh for Home Assistant, the ESPHome proxy transport lets you reuse it without flashing a dedicated ESP32.
The ESP32 scans autonomously for BLE advertisements and publishes results over MQTT. BLE Scale Sync matches scale adapters against the scan data, identifies users by weight, computes body composition, and dispatches to exporters. For scales that require a GATT connection, the server sends connect/write/read commands back to the ESP32 over MQTT. All scale-specific logic stays on the server.
How It Works
┌───────┐  BLE   ┌────────┐  MQTT  ┌─────────────┐  MQTT  ┌────────────────┐
│ Scale │ ────── │ ESP32  │ ────── │ MQTT Broker │ ────── │ BLE Scale Sync │
└───────┘ advert └────────┘        └─────────────┘        └────────────────┘
          + GATT  MicroPython       e.g. Mosquitto          Docker / Node.js
Broadcast scales (weight in BLE advertisements):
- The ESP32 continuously scans for BLE advertisements (results every 2 s on ESP32-S3 boards, every 10 to 13 s on classic ESP32 boards)
- Scan results (names, services, manufacturer data) are published to MQTT
- BLE Scale Sync reads weight from broadcast advertisement data
- Body composition is computed and dispatched to exporters
- Feedback (beep, display updates) is sent back to the ESP32 via MQTT
A scale that is read from its advertisements is never read over a connection, even when it also offers a GATT service. The Xiaomi Mi Scale 2 is the common case: it puts weight and impedance in the advertisement, and a connection only stops it advertising the reading. The server tells the ESP32 which known scales are like this, so it beeps for them but does not connect.
The server learns which scales these are while it runs and does not keep that across restarts. With ble.scale_mac set, each start republishes the scale list, usually without the flag, so after every restart the first weigh-in can still see one connect. The server drops that connection as soon as the scale's characteristics identify it, then tells the ESP32 again; the reading still comes from the advertisement.
GATT scales (notification-based readings):
- The ESP32 detects a known scale MAC during scanning and auto-connects immediately
- The ESP32 discovers characteristics and notifies the server that it's already connected
- The server subscribes to notification topics and sends write commands (e.g. unlock)
- Scale readings arrive as notifications, forwarded to the server via MQTT
- The server sends a
disconnectcommand when the reading is complete
Autonomous connect
The ESP32 connects to known scales autonomously the instant it detects them, eliminating the MQTT round-trip that previously caused some fast-sleeping scales to power off before the connection could be established. This behavior is on by default. To disable it and use the old host-initiated connect flow, set auto_connect: false under mqtt_proxy in your config.
Scales read from their advertisements are excluded from the autonomous connect. When every scale the server knows about is one of them, the server turns the autonomous connect off on the ESP32 by itself; when broadcast and GATT scales share one proxy, only firmware that understands the passive list (see MQTT Topics) can skip the broadcast ones individually.
Run the server in continuous mode with this handler. The ESP32 decides when to connect, and only the continuous-mode watcher stays subscribed to the connected topic; a single run listens only during its own scan window, so an autonomous connect that lands outside it is lost. Set runtime.continuous_mode: true (or CONTINUOUS_MODE=true). The server warns at startup if the mqtt-proxy handler is used without it.
Supported Boards
Any ESP32 board running MicroPython with BLE support works. Tested on:
| Board | Price | Notes |
|---|---|---|
| M5Stack Atom Echo (ESP32-PICO) | ~8€ | Tiny, no PSRAM, ~100 KB free RAM, I2S buzzer for beep feedback |
| Generic ESP-WROOM-32 dev board | ~5€ | Stock ESP32 module, no display, BLE/WiFi share radio (slower scans) |
| ESP32-S3-DevKitC | ~12€ | Standard dev board, plenty of RAM |
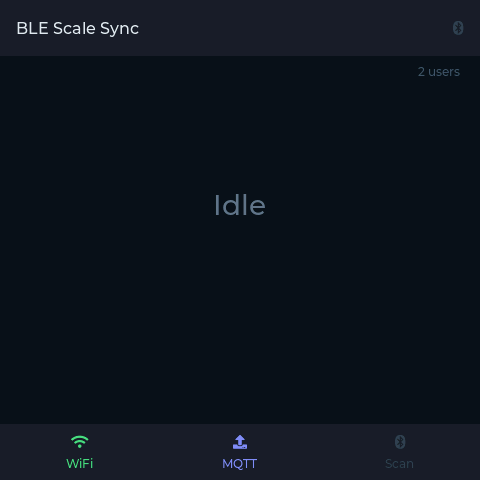
| Guition ESP32-S3-4848S040 | ~25€ | 480x480 RGB display, shows scan status and export results via LVGL UI |
The board is auto-detected from the chip family. Set "board" in config.json to override (e.g. "esp_wroom_32" for a generic WROOM-32 module, "guition_4848" for the display board, "atom_echo" for the Atom Echo). Auto-detect cannot distinguish a WROOM-32 from an Atom Echo, so WROOM-32 users must set the override (or pass --board esp_wroom_32 to flash.sh).
Broadcast vs GATT scales and RAM
Broadcast-only scales (the reading is in the advertisement) work on every board listed above. GATT-connect scales, which need an active connection (e.g. QN Scale / Renpho ES-CS20M, Yunmai, Inlife, some Eufy), are RAM-heavy: the BLE stack allocates the connection from the ESP-IDF heap, which is separate from the MicroPython heap. On a no-PSRAM board (classic ESP-WROOM-32, Atom Echo) that heap can run out while WiFi and MQTT are active, so the connect times out or the board reboots. For GATT-connect scales use a board with PSRAM (ESP32-S3-DevKitC, Guition). Both classic ESP32 and S3 share one 2.4 GHz radio via time-division coexistence; the S3 advantage here is RAM, not the radio.
Scale type vs board support
| Scale type | Example scales | No-PSRAM classic ESP32 (WROOM-32, Atom Echo, ESP-32D) | ESP32-S3 / PSRAM (S3-DevKitC, Guition) |
|---|---|---|---|
| Broadcast-only (reading is in the advertisement) | Mi Scale 2, Xiaomi S800 | Reliable | Reliable |
| GATT-connect (needs an active connection) | Yunmai, Inlife, Eufy T9120, QN / ES-CS20M | Not supported, clean skip | Supported |
A no-PSRAM classic ESP32 is a reliable broadcast-only proxy. For GATT-connect scales use an ESP32-S3 / PSRAM board, because the BLE central connection plus GATT discovery needs kilobytes of ESP-IDF internal heap that WiFi-STA plus NimBLE plus the MicroPython GC heap leave near zero on a no-PSRAM board (the steady-state largest contiguous block is about 336 bytes with WiFi up).
Not compatible
ESP32-C3 and ESP32-C6 boards use a different BLE stack in MicroPython and have not been tested. Classic ESP32 and ESP32-S3 are recommended.
Requirements
- An ESP32 board (see above)
- WiFi network accessible by both the ESP32 and BLE Scale Sync
- USB cable for initial flashing
MQTT broker is optional
BLE Scale Sync now ships with an embedded MQTT broker. If you don't already run one (Mosquitto, Home Assistant, etc.), just leave broker_url empty and BLE Scale Sync will start its own broker on port 1883. See Embedded broker below.
Host tools (install once)
Install the tested host-tool versions:
pip install -r firmware/requirements-flash.txtesptool 5.x needs Python 3.10 or newer. If you prefer a virtual environment, create it inside firmware/ first with python -m venv venv, then activate it: source venv/bin/activate on macOS and Linux, source venv/Scripts/activate in Git Bash on Windows, or venv\Scripts\Activate.ps1 in PowerShell.
Flashing the Firmware
1. Configure
Copy the example config and edit your WiFi and MQTT settings:
cd firmware/
cp config.json.example config.json
Edit config.json:
{
  "board": null,
  "wifi_ssid": "MyNetwork",
  "wifi_password": "secret",
  "mqtt_broker": "192.168.1.100",
  "mqtt_port": 1883,
  "mqtt_user": null,
  "mqtt_password": null,
  "device_id": "esp32-ble-proxy",
  "topic_prefix": "ble-proxy"
}
2. Flash
Connect the ESP32 via USB and run the flash script:
# Full flash: erase -> MicroPython -> libraries -> app
./flash.sh

# Or just re-upload the app (fast iteration)
./flash.sh --app-only

# Or just reinstall MicroPython libraries
./flash.sh --libs-only
The script auto-detects the serial port. Override with PORT=/dev/ttyACM0 ./flash.sh if needed. ./flash.sh --help lists the options; an unknown option stops the script before anything is written to the board.
Windows users
flash.sh is a bash script and will not run in cmd.exe or PowerShell directly. Running flash.sh from CMD just opens it in your default editor. Use one of:
Git Bash (simplest): install Git for Windows, then in Git Bash:
bashcd firmware PORT=COM3 ./flash.shReplace
COM3with the port shown in Device Manager under Ports (COM & LPT) when the ESP32 is plugged in.WSL: works, but you must attach the USB serial device into WSL with
usbipdfirst.Manual flash from CMD/PowerShell:
esptoolandmpremoteare cross-platform Python tools, so you can run the equivalent commands by hand:powershell# 1. Erase + flash MicroPython (download the .bin from micropython.org for your board first) esptool --chip esp32s3 --port COM3 erase-flash esptool --chip esp32s3 --port COM3 --baud 460800 write-flash 0x0 ESP32_GENERIC_S3-SPIRAM_OCT-v1.27.0.bin # 2. Install MicroPython libraries mpremote connect COM3 mip install "[email protected]" mpremote connect COM3 mip install "github:peterhinch/micropython-mqtt@70b56a7a4aaf" mpremote connect COM3 mip install "github:peterhinch/micropython-async/v3/primitives@68b5f01e999b" # 3. Upload application files (run from firmware/) mpremote connect COM3 cp config.json :config.json mpremote connect COM3 cp boot.py :boot.py mpremote connect COM3 cp board.py :board.py mpremote connect COM3 cp board_esp32_s3.py :board_esp32_s3.py mpremote connect COM3 cp ble_bridge.py :ble_bridge.py mpremote connect COM3 cp beep.py :beep.py mpremote connect COM3 cp main.py :main.py mpremote connect COM3 resetAdjust
--chip, the firmware filename, andboard_*.pyfor your board (see theconfigure_board()cases inflash.sh).
Atom Echo / ESP32-PICO
Some boards need a slower baud rate. If flashing fails, edit BAUD=115200 in flash.sh.
ESP32-S3-4848 (display board)
This board requires custom LVGL MicroPython firmware. See PORTING.md for build instructions:
cd drivers && ./build.sh guition_48483. Verify
Check the serial console to confirm WiFi and MQTT connection:
mpremote connect /dev/ttyUSB0 replYou should see:
BLE-MQTT bridge ready: ble-proxy/esp32-ble-proxyOr check the MQTT status topic:
mosquitto_sub -h <broker-ip> -t 'ble-proxy/esp32-ble-proxy/status'
# Should print: online
Configuring BLE Scale Sync
Add the ble section to your config.yaml:
ble:
  handler: mqtt-proxy
  mqtt_proxy:
    broker_url: 'mqtt://192.168.1.100:1883'
    device_id: esp32-ble-proxy # must match config.json
    topic_prefix: ble-proxy # must match config.json
    # username: myuser                # optional, if broker requires auth
    # password: '${MQTT_PASSWORD}'    # optional
Embedded broker
If you don't want to install Mosquitto (or you're already running BLE Scale Sync on a machine that can just host the broker itself), omit broker_url and BLE Scale Sync will start an embedded broker automatically. The ESP32 config.json should then point mqtt_broker at this machine's LAN IP.
ble:
  handler: mqtt-proxy
  mqtt_proxy:
    # broker_url intentionally omitted, embedded broker will be started
    device_id: esp32-ble-proxy
    topic_prefix: ble-proxy
    embedded_broker_port: 1883 # default, override to avoid conflicts
    embedded_broker_bind: 0.0.0.0 # listen on all interfaces so the ESP32 can reach it
    username: myuser # required when bind is non-loopback
    password: '${MQTT_PASSWORD}' # required when bind is non-loopback
The internal BLE Scale Sync client always connects to the embedded broker over loopback (mqtt://127.0.0.1:<port>). The ESP32 connects over LAN, so make sure port 1883 (or whatever you pick) is reachable from the ESP32 and not blocked by a host firewall.
Authentication required on LAN
When embedded_broker_bind is 0.0.0.0 (or any non-loopback interface) the schema requires username + password. An unauthenticated broker on your LAN is rejected at config validation time. For single-host deployments where the ESP32 is not used, set embedded_broker_bind: 127.0.0.1 to skip auth safely.
When to pick which
Use the embedded broker for the simplest ESP32 proxy setup when you don't already have Mosquitto or Home Assistant. Use an external broker when you already run one, or when you want multiple services (Home Assistant, Node-RED, other IoT devices) to share it.
Port conflict
If Mosquitto or another broker is already listening on port 1883, the embedded broker startup will fail with a clear message. Either stop the other broker, or set embedded_broker_port to a free port (e.g. 1884) and update the ESP32 config.json to match.
Then restart BLE Scale Sync. In continuous mode, the server maintains a persistent MQTT connection and reacts to scan results as they arrive.
Environment variable
You can also set BLE_HANDLER=mqtt-proxy as an environment variable instead of editing config.yaml.
Setup wizard
ble-scale-sync setup (npm run setup from a clone) includes interactive mqtt-proxy configuration steps that generate the YAML above for you.
Reusing your MQTT exporter broker
If you already have an MQTT exporter configured, the ESP32 proxy can use the same broker. Just make sure device_id and client_id don't collide.
Security
The default mqtt:// URL transmits data in plaintext, including body weight and composition data. On untrusted networks, use a TLS-enabled broker (usually port 8883). mqtts:// in broker_url covers only the server's own connection. The ESP32 connects on its own and needs TLS turned on in its config.json: set "mqtt_tls": true, and "mqtt_ca_file" to a CA certificate uploaded with the firmware to verify the broker ("mqtt_tls_hostname" when the broker is reached by IP address). Without a CA file the link is encrypted but the broker is not verified.
Home Assistant add-on
The add-on sets this transport up from its Configuration tab: set Bluetooth transport to mqtt-proxy, then pick the broker with ESP32 proxy broker:
shared(default) uses the broker of the add-on's MQTT options, which is the Mosquitto broker add-on when MQTT auto-detection is on, even with the MQTT exporter turned off. Give the ESP32 its own login on that broker (a Home Assistant user, or an entry underloginsin the Mosquitto add-on) and put it inmqtt_userandmqtt_passwordofconfig.json.embeddedstarts the broker inside the add-on. Embedded broker username and Embedded broker password are required, since the broker listens on the host's network. The Mosquitto add-on usually holds port 1883 on the host, so set Embedded broker port to a free one such as1884and the samemqtt_portinconfig.json.
mqtt_broker in config.json is that broker's address: the Home Assistant host's IP address for the Mosquitto add-on and for embedded, the broker's own address for one set by hand in the add-on's MQTT options. ESP32 proxy device ID and ESP32 proxy topic prefix must match device_id and topic_prefix there.
Docker Deployment
When using the ESP32 proxy, BLE Scale Sync does not need local Bluetooth at all. This means the Docker container requires no BlueZ, D-Bus mounts, or NET_ADMIN capability.
A dedicated compose file is included:
# docker-compose.mqtt-proxy.yml
services:
  ble-scale-sync:
    image: ghcr.io/kristianp26/ble-scale-sync:latest
    container_name: ble-scale-sync
    volumes:
      - ./config.yaml:/app/config.yaml
      - garmin-tokens:/app/garmin-tokens
    environment:
      - CONTINUOUS_MODE=true
    restart: unless-stopped
    logging:
      driver: json-file
      options:
        max-size: '10m'
        max-file: '3'

volumes:
garmin-tokens:docker compose -f docker-compose.mqtt-proxy.yml up -dCompare this to the standard Docker deployment which needs network_mode: host, /var/run/dbus bind mount, and NET_ADMIN. The mqtt-proxy approach avoids all of that because BLE communication happens on the ESP32, not the host.
Firmware Files
Firmware directory layout
| File | Purpose |
|---|---|
config.json.example | WiFi + MQTT config template |
flash.sh | One-command flash script |
boot.py | Stub (WiFi managed by mqtt_as) |
main.py | MQTT dispatch + autonomous scan loop |
ble_bridge.py | BLE scanning via aioble |
beep.py | I2S buzzer driver (boards with HAS_BEEP) |
board.py | Board auto-detection dispatch |
board_atom_echo.py | Atom Echo config (no PSRAM, I2S beep) |
board_esp_wroom_32.py | Generic ESP-WROOM-32 config (no display) |
board_esp32_s3.py | Generic ESP32-S3 config |
board_guition_4848.py | Guition 4848 config (LVGL display) |
panel_init_guition_4848.py | ST7701S panel init sequence data |
ui.py | LVGL display UI (boards with HAS_DISPLAY) |
mip-packages.txt | MicroPython libraries installed via mip |
requirements-flash.txt | Pinned host tools for flash.sh |
What the firmware does
- Autonomous scanning: scans for BLE advertisements in a continuous loop. ESP32-S3 boards scan without pause and publish every 2 s; classic ESP32 boards scan for 5 to 8 s, publish, and wait 5 s (
SCAN_DURATION_MS,SCAN_INTERVAL_MS,PUBLISH_INTERVAL_MSin the board file) - Scale detection: beeps when a known scale MAC is seen (MACs registered by the server after adapter matching)
- Radio management: on shared-radio boards (ESP32-PICO), deactivates BLE after each scan so WiFi can recover
- Display UI (4848 board): shows WiFi/MQTT/BLE status, scan activity, user match results, and export outcomes
- Config sync: receives scale MAC list and user info from the server for local feedback
Scan modes diagram
See docs/images/scan-modes.drawio for a visual overview of how broadcast and GATT scan modes interact with the ESP32 proxy.
MQTT Topics
All topics are prefixed with {topic_prefix}/{device_id}/ (default: ble-proxy/esp32-ble-proxy/).
| Topic | Direction | Payload |
|---|---|---|
status | ESP32 -> Server | "online" / "offline" (retained, LWT) |
error | ESP32 -> Server | JSON with op (connect, auto-connect, scan, subscribe, write, read, command), message and, where it applies, address / uuid. Older firmware sends a plain string |
scan/results | ESP32 -> Server | JSON array of discovered devices |
config | Server -> ESP32 | JSON with scales (MAC array), users (array), passive (MACs read from advertisements, never connected), autoConnect (false to disable the autonomous connect), lazy_notify (true: enable a notification only on subscribe/{uuid}), retained |
beep | Server -> ESP32 | Empty string or JSON with freq (20 to 4000 Hz), duration (1 to 500 ms), repeat (1 to 3); values outside are clamped |
display/reading | Server -> ESP32 | JSON with user slug, name, weight, impedance, and exporter list |
display/result | Server -> ESP32 | JSON with user slug, name, weight, and per-exporter success/failure results |
connect | Server -> ESP32 | JSON with address and addr_type |
connected | ESP32 -> Server | JSON with address, discovered chars (uuid + properties per characteristic), and autonomous: true when the ESP32 connected on its own |
disconnect | Server -> ESP32 | Any payload (triggers disconnect) |
disconnected | ESP32 -> Server | Empty payload |
subscribe/{uuid} | Server -> ESP32 | Empty payload; enables the notification on that characteristic (with lazy_notify) |
notify/{uuid} | ESP32 -> Server | Raw binary (characteristic notification) |
write/{uuid} | Server -> ESP32 | Raw binary (characteristic write) |
read/{uuid} | Server -> ESP32 | Empty payload (triggers read) |
read/{uuid}/response | ESP32 -> Server | Raw binary (read result) |
screenshot | Server -> ESP32 | Display boards only: request a framebuffer dump. Refused (an error with op: "screenshot") while a BLE connection is in progress |
screenshot/info, screenshot/{n}, screenshot/done | ESP32 -> Server | Display size and format, then the RGB565 framebuffer in numbered chunks, then the chunk count |
Troubleshooting
Unlock write every 3 s, then "GATT session cap exceeded" after 90 s
The log shows Autonomous GATT connect from ESP32: Xiaomi Mi Scale 2, an Unlock write every 3 seconds, and the session ending at exactly 90 s. The Mi Scale 2 is read from its advertisements, not over a connection, and earlier releases let the ESP32 connect to it anyway. With the fix, the server drops such a connection straight away and logs Autonomous connect to Xiaomi Mi Scale 2 (...) ignored: this scale is read from its advertisements, not over GATT, then tells the ESP32 to stop connecting to that scale. After a restart of BLE Scale Sync this can happen once more on the first weigh-in (see How it works). Update BLE Scale Sync; if the same proxy also serves a GATT scale, flash the current firmware too.
If you cannot update yet, remove ble.scale_mac and set auto_connect: false under mqtt_proxy, so the ESP32 is never told to connect to the scale.
ESP32 shows "online" but scans find nothing
- Move the ESP32 closer to the scale. Small boards like the Atom Echo have limited BLE range.
- Some scales only advertise while actively measuring (display lit up). Step on the scale during a scan cycle.
WiFi won't reconnect after BLE scan
On shared-radio boards (ESP32-PICO), the firmware deactivates BLE after each scan to free the 2.4 GHz radio. If WiFi still fails:
- Check that your WiFi router is on a 2.4 GHz band (5 GHz won't work with ESP32)
- Try reducing
SCAN_DURATION_MSin the board config
ESP32-S3 boards have enough RAM (PSRAM) to keep BLE active alongside WiFi, so they don't deactivate BLE after a scan. The radio is still shared on both chips (time-division coexistence); the difference is available memory.
Scan timeout (30s) on first scan after boot
The first scan after boot may take longer because the ESP32 needs to establish the WiFi connection. Subsequent scans are faster (~8-10 seconds).
Out of memory on ESP32-PICO / Atom Echo
Boards without PSRAM have ~100 KB free after boot. If you see MemoryError:
- The firmware already deduplicates scan results and runs
gc.collect()aggressively - Reduce
SCAN_DURATION_MSinboard_atom_echo.pyto find fewer devices - Avoid running other MicroPython code alongside the bridge
GATT connect times out or the ESP32 reboots (classic ESP32 / no PSRAM)
A GATT-connect scale (one that needs an active connection, not just a broadcast) can make a no-PSRAM board time out on connect. The cause is the ESP-IDF heap running out: the BLE stack allocates the connection from that heap (separate from the MicroPython heap), and WiFi + MQTT leave little room on a classic ESP32 / Atom Echo.
As of this release the firmware no longer reboots on a near-empty ESP-IDF heap. It reads the internal-RAM part of the heap right before connecting (on PSRAM boards the SPIRAM is not counted, since the BLE stack does not allocate from it), and when it is too low it refuses the connect, prints a clear line, keeps scanning, and reports an MQTT error to the host instead of crashing with the NimBLE semaphore assertion (assertion:semaphor->handle / npl_freertos_sem_init, Guru Meditation). The skip line looks like:
IDF heap too low for GATT connect: free=<bytes> largest=<bytes> (#139)It still prints the heap headroom over serial just before each connect, which tells a RAM ceiling apart from radio contention:
IDF heap before connect: free=<bytes> largest=<bytes>- A very small
largestbefore a refused or failed connect means you are out of RAM. Use a board with PSRAM (ESP32-S3-DevKitC, Guition) for GATT-connect scales. - A healthy
largestplus a timeout points at radio contention instead; move the board closer to the scale and retry.
Advanced: tuning the guard. The guard ships with per-board tunables CONNECT_MIN_IDF_LARGEST and CONNECT_MIN_IDF_FREE set to 0, so by default only an always-on conservative crash floor (about 1 KB largest, 2 KB free) is active. That floor only ever trips the pathological near-empty case and never refuses a connect that could have succeeded.
To calibrate a higher floor: on a PSRAM board where a connect succeeds, temporarily log the IDF heap before connect and again after connect plus discovery, take the (free_before - free_after) delta and the post-connect largest block, then set CONNECT_MIN_IDF_FREE a little above the delta and CONNECT_MIN_IDF_LARGEST a little above the post-connect largest in that board's board_*.py. Treat a value calibrated this way with care: the logged figures sum every ESP-IDF data-heap region, which on a PSRAM board likely includes PSRAM as well as the internal RAM the BLE stack allocates from, so they can look healthier than the memory a connect actually needs. On a no-PSRAM board with WiFi up a non-zero tunable only ever produces a clean skip, never a successful connect, because gc.collect() cannot hand kilobytes back to the IDF heap.
Broadcast-only scales are unaffected and work on every board.
A GATT-only scale never connects with auto_connect
Some scales (for example the QN-Scale) expose no broadcast data and must be GATT-connected to read. With auto_connect on, the ESP32 connects itself the instant it sees a known scale MAC, but it only treats a MAC as known once the server has told it about that MAC. Set ble.scale_mac to your scale so the server seeds that MAC to the ESP32 at startup and the autonomous connect can fire on the first sighting. Without a scale_mac, the server still recovers by falling back to a slower host-initiated connect after a few scan cycles, so a configured scale_mac is recommended for GATT-only scales.
The ESP32 connects once per boot and then stops scanning
The proxy pauses its scan for the duration of a GATT session, and a session used to end only when the server said so or when a notify reader saw the link drop. With lazy notify no reader runs until the server subscribes, so a session the server never engaged with left the scan paused until the ESP32 was reset: exactly one autonomous connect per boot.
The firmware now guards every session it publishes. It ends the session and resumes scanning by itself when the link is already down, when the server has not engaged with the session at all within about 20 seconds, or when the session runs past three minutes, and prints the reason (GATT session guard: ...) on the serial console. Boards can tune this with GATT_SESSION_IDLE_MS and GATT_SESSION_MAX_MS.
If the server did engage but the session still ends this way, the usual cause is a server not in continuous mode: see the autonomous-connect note above.
A random-address scale times out on connect
Some scales advertise a random Bluetooth address (the first MAC byte is C0 or higher, for example FF:03:..) rather than a fixed public one. The proxy connects with the address type the controller reported for the scan result first. If that connect times out it retries once with the opposite address type, so a scale reported with the wrong type still connects on the second try. The proxy connects with minimal delay after spotting the scale and publishes the scan results afterward, because a GATT-only scale that was just stepped on stays connectable for only a short window. If your scale used to log GATT connect attempt ... failed ... TimeoutError on every weigh-in, update the firmware and try again.